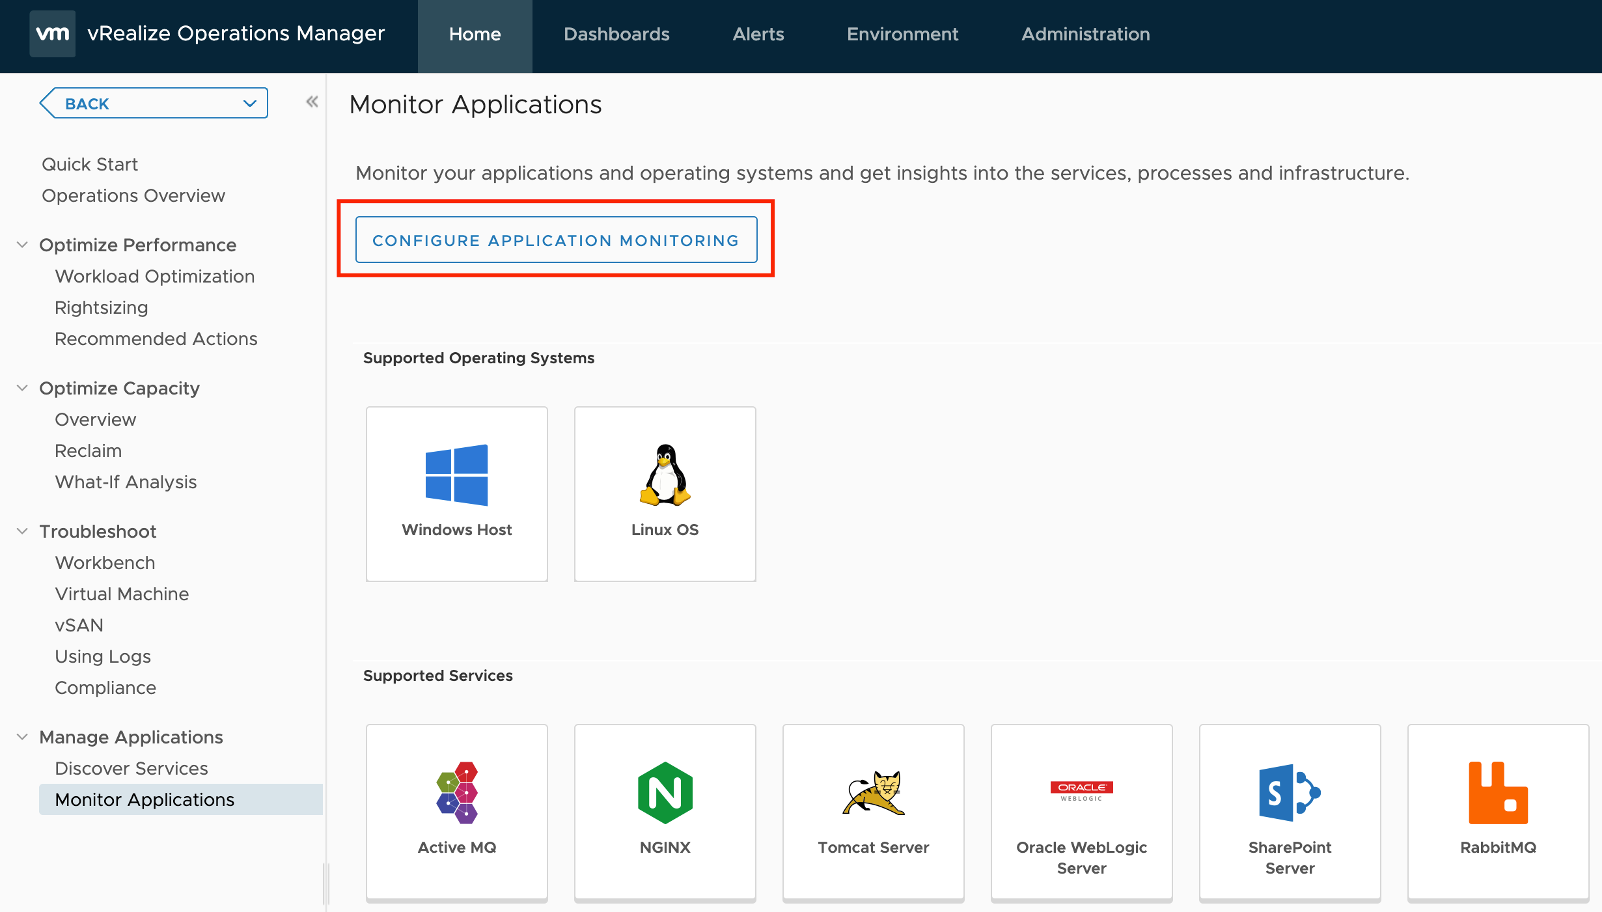
Applications Monitoring is an exciting functionality in vRealize Operations. To start monitoring one of the twenty services currently supported by vROps, the vRealize Operations Application Remote Collector (ARC) needs to be deployed and configured in vROps.
The Application Remote Collector is provided as OVA and the deployment process runs similarly to any other VMware OVA deployment.
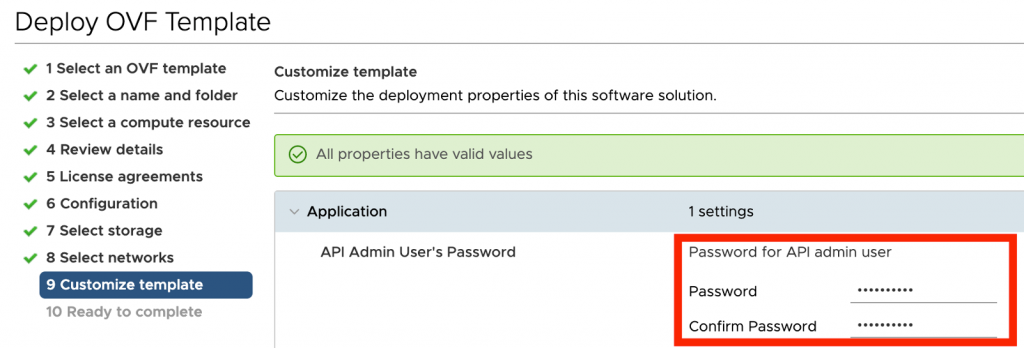
The most important part during the deployment of the ARC is the API Admin user’s password which is needed for the configuration of this particular ARC in vROps.
Adding the Application Remote Collector (ARC) to vROps
From the vROps “Home” screen you start the configuration of the freshly deployed ARC.
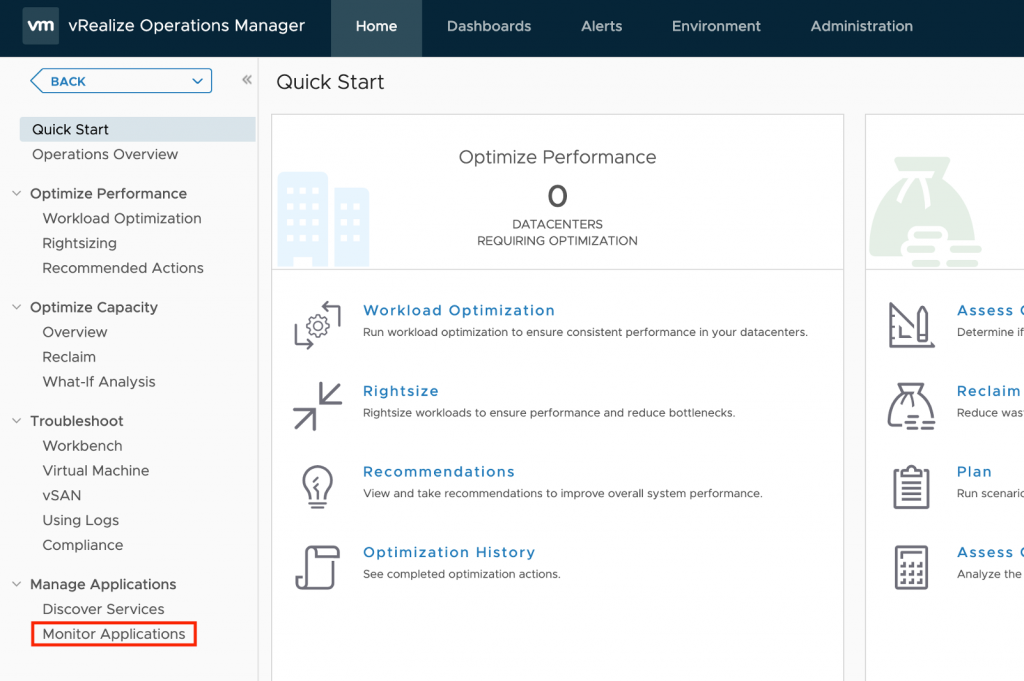
Click on “Configure Application Monitoring” to start the process.

In the following step a freshly deployed ARC can be added and configured. There is also an option to download the OVA just by clicking on the green arrow button.

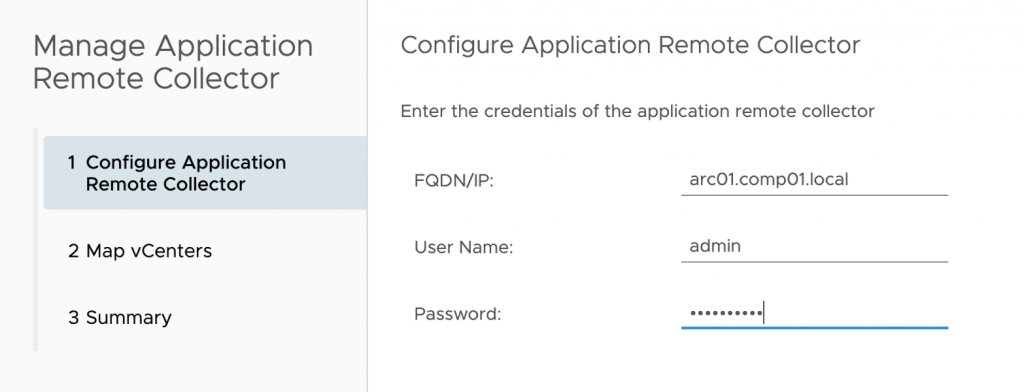
The next dialog expects basically two values, the FQDN or IP of the ARC and the Admin User’s password specified during the OVA deployment.
In the next step we need to specify the vCenters which will be managed by this instance of the Application Remote Collector. One ARC can manage multiple vCenter instances.
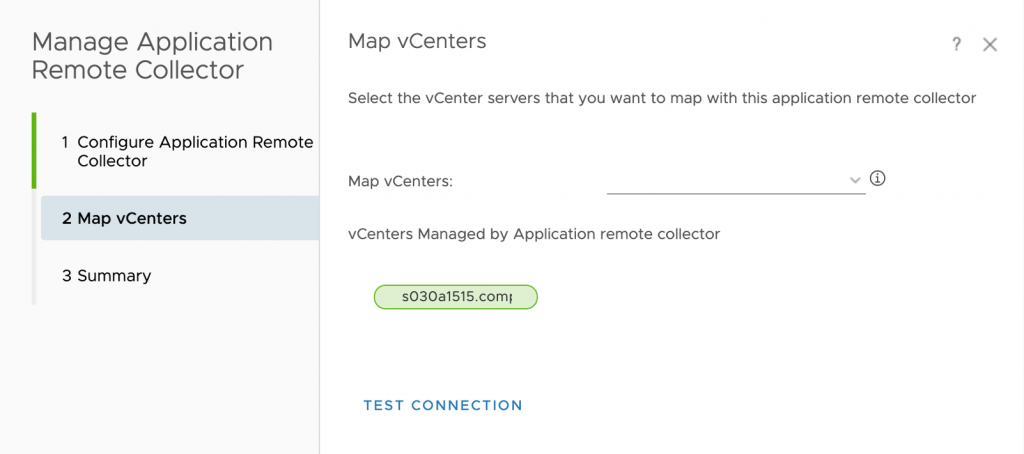
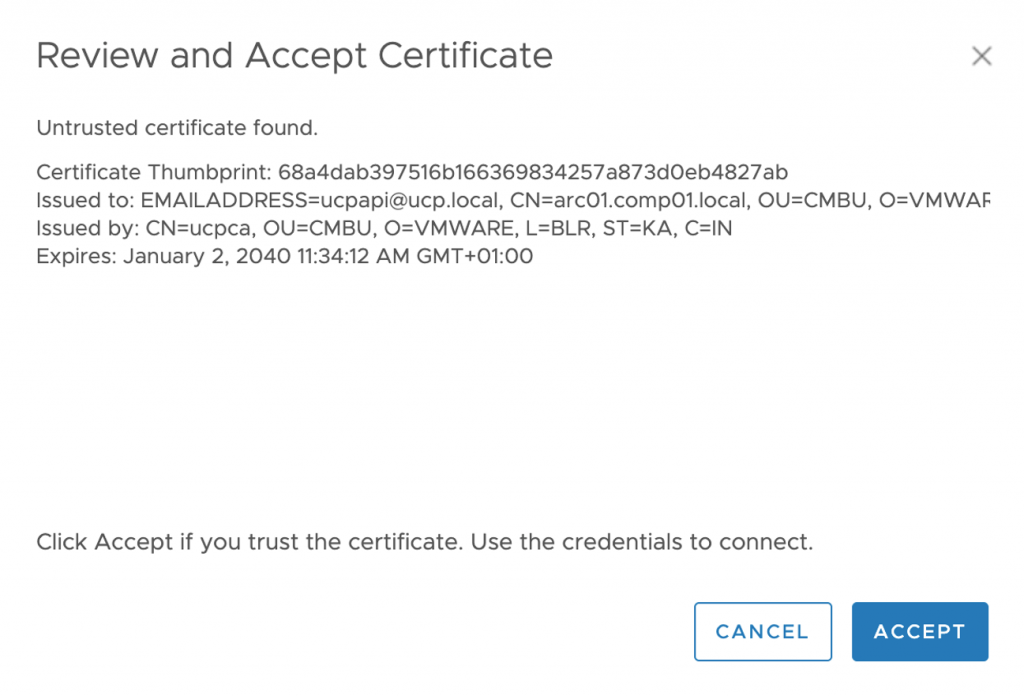
We can test the connection and after accepting the certificate we can click on “Finish” and complete the ARC configuration.
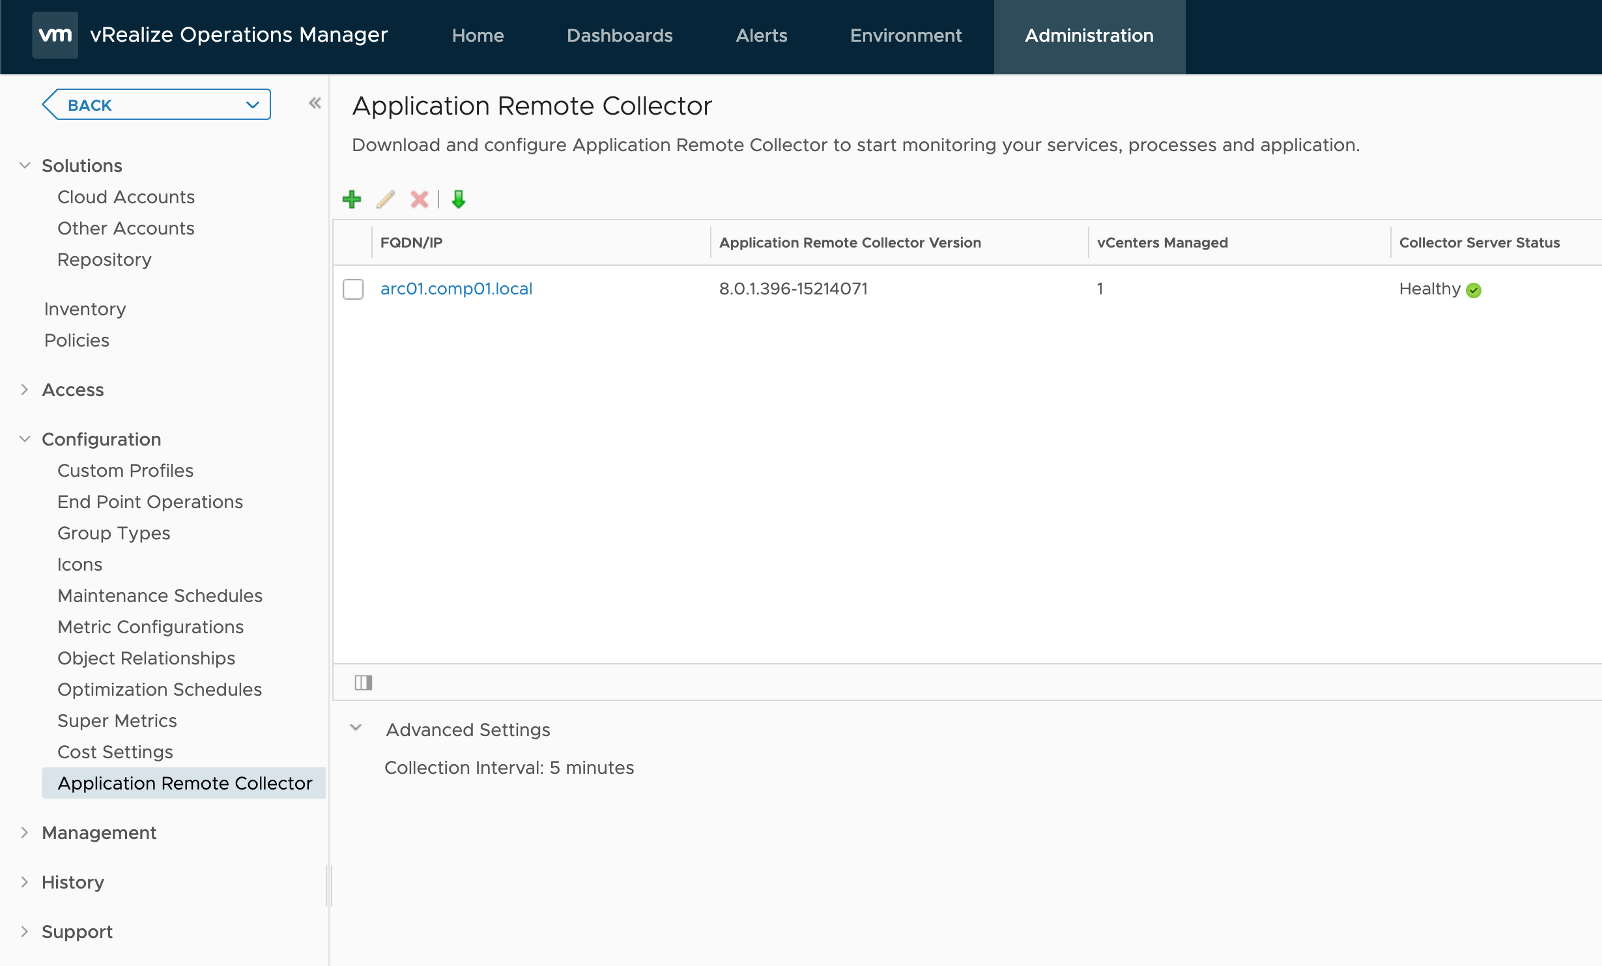
After few minutes, the status of the ARC should show “Healthy” and report back the correct version.
Managing Agents
Once the ARC has been configured in vROps we can install agents on VMs running in the vCenter(s) managed by this particular ARC.
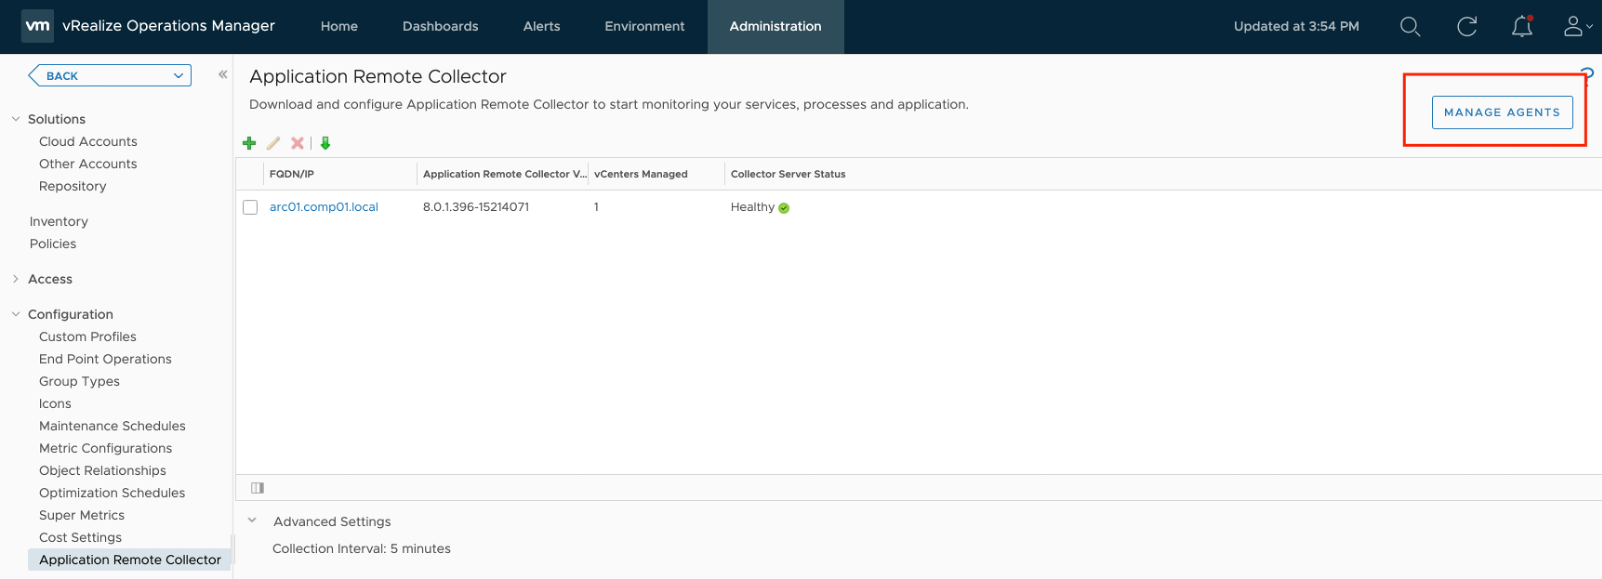
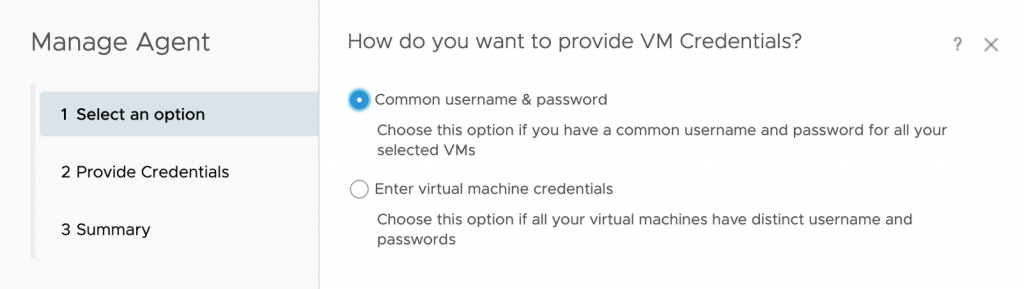
One click on “Manage Agents” brings uns to the vROps Inventory – “Manage Agents” tab. Here we can select one or multiple VM objects and start the installation of the agent.
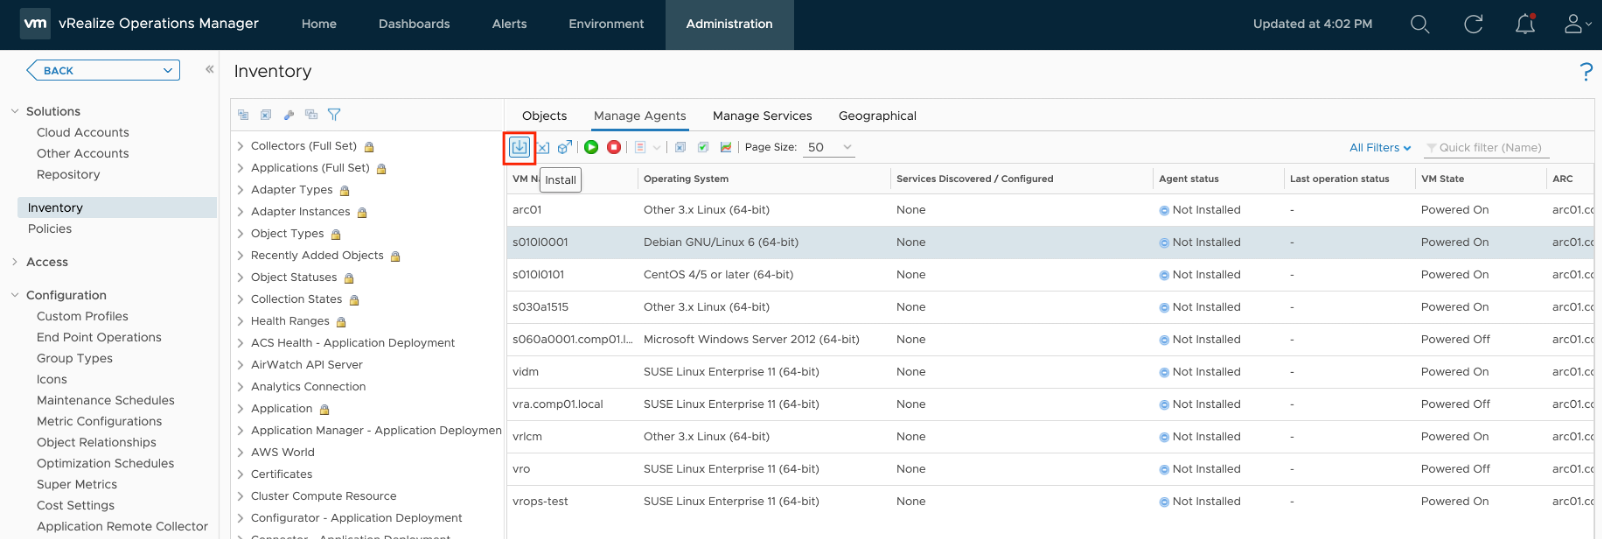
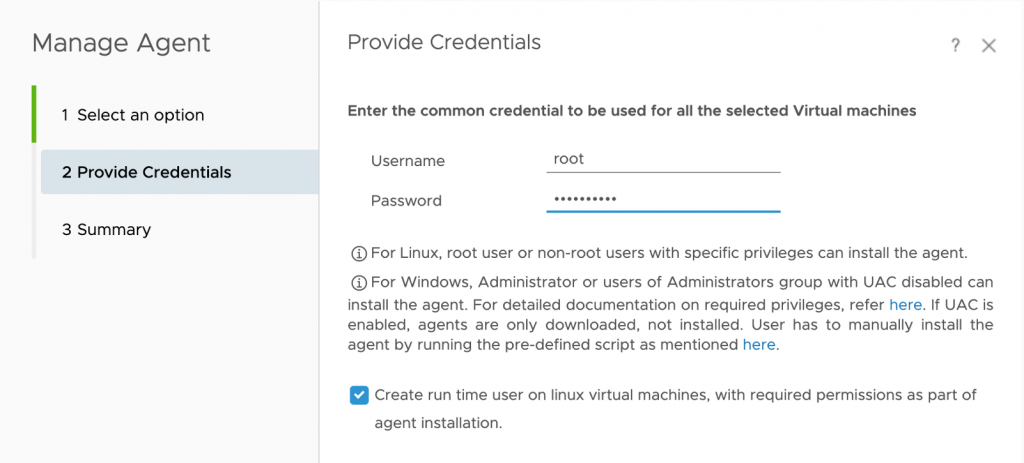
We need to enter credentials. For the user account prerequisites please see:
Since I am installing the first agent on a Linux machine, and this is just a test lab, I am using the root account, which should be avoided in production environments.
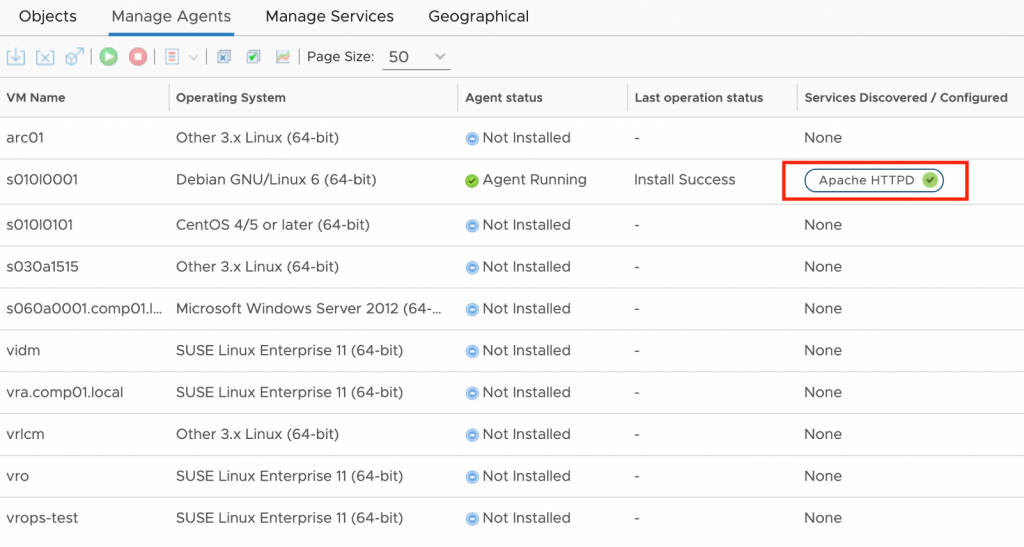
After clicking on “Install Agent” and waiting several minutes, the status of the agent should be like in the following figure.
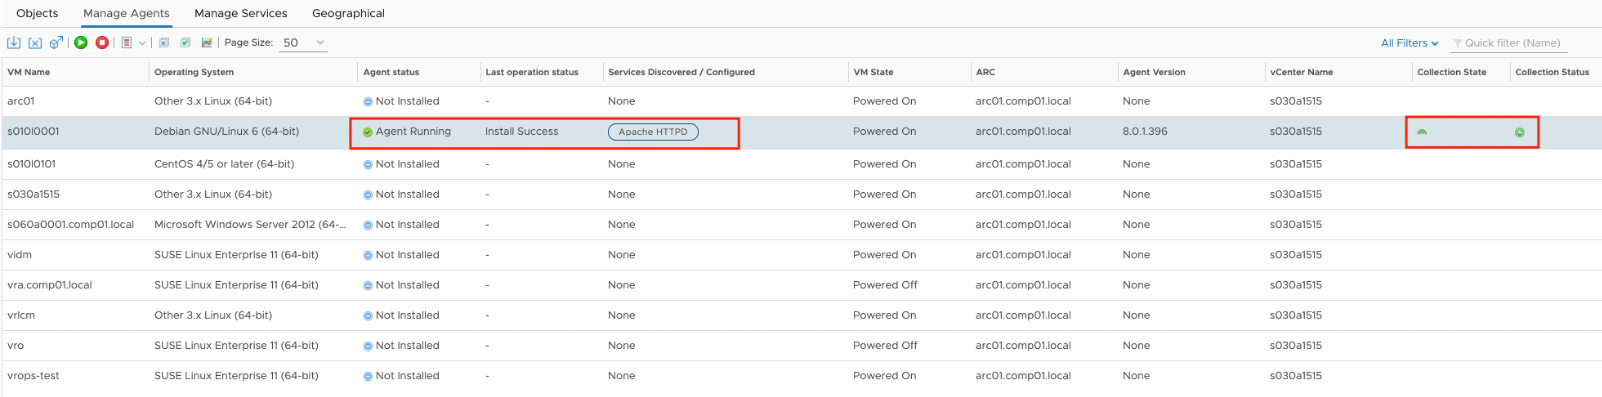
As you can see in the Figure 13, the agent discovered Apache HTTPD service running on the VM.
NOTE: This has nothing to do with the vROps Service Discovery functionality.
At this stage there is still no vROps object related to the discovered Apache instance.
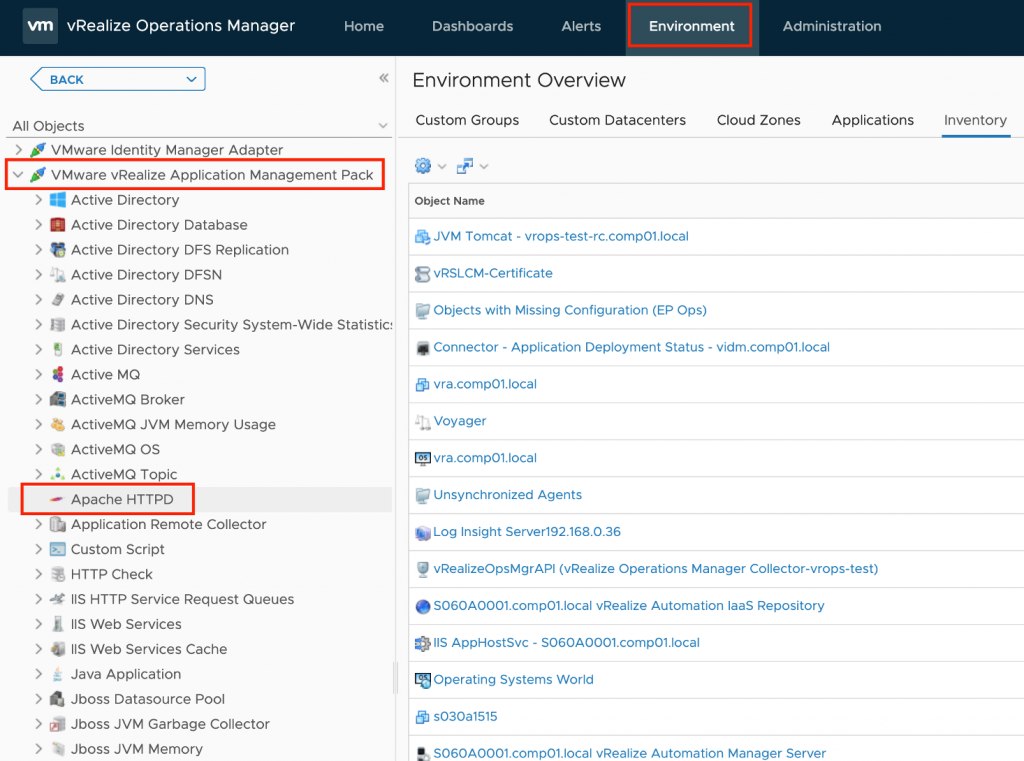
This is because we first need to configure the agent to properly monitor any discovered (supported) service.

My Apache instance has been configured to serve the status page, this does not have to be the same in every Apache installation, so be sure that your Apache is configured accordingly.

After clicking on “Save” and “Close” and waiting few minutes, we see a successful configuration.
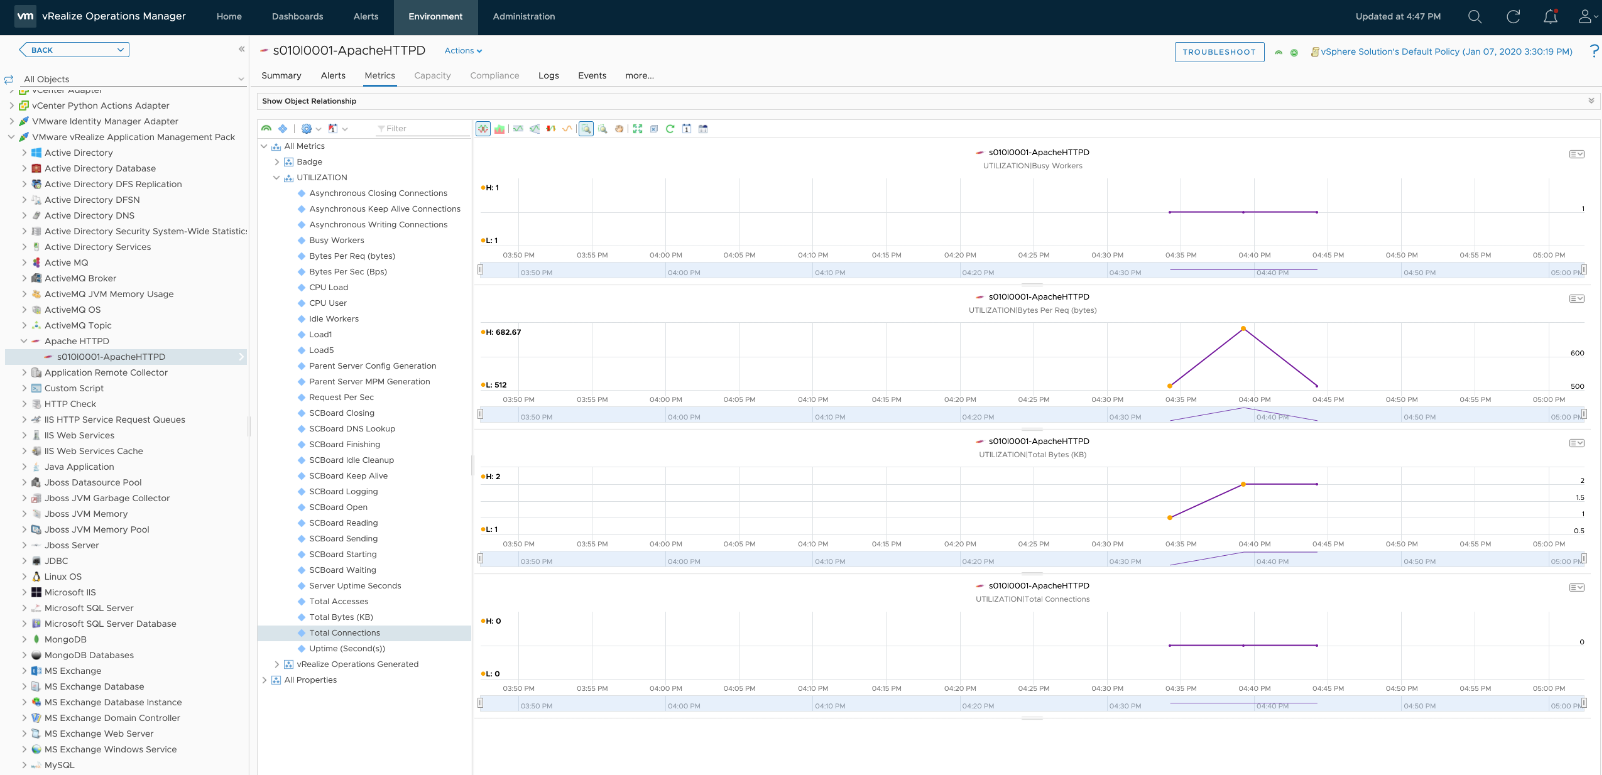
After few collection cycles we see the corresponding vROps object and the collected metrics and properties.
Application Monitoring integrated into vRealize Operations opens up new perspectives and contributes to the holistic view into IT environments provided by vROps.