vRealize Operations provide a wide range of content OOB. It gives the Ops teams a variety of dashboards, view, alerts etc. to run and manage their environments.
Sooner or later, in most cases rather sooner than later, vROps users will create their own content. It might be completely new dashboards or maybe just adjusted alert definitions.
Whatever content you create in vRealize Operations, you should treat it like every other software development project.
Ideally you have a development, test and production vROps instances. If this footprint is just too big for your environment, you should at least have a single node test/dev for content development and testing before you import that content into your production instance.
Managing content in vROps, exporting dashboards, views, alert definitions etc. and importing the corresponding files into another vROps instance may be very cumbersome and error prone.
This is where vRealize Suite Lifecycle Manager comes into play.
vRSLCM offers all features to make the management of vRealize Operations (and vRA/vRO/vCenter) content an easy task.
In this post I will describe the basics of vROps content management using vRealize Suite Lifecycle Manager and GitLab.
Logical Design
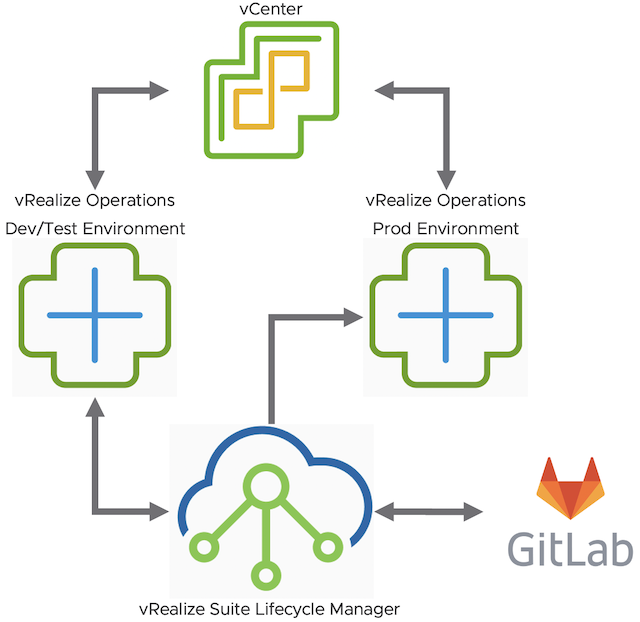
The procedure described in this post is based on the following logical design of the vROps environment including vRSLCM and GitLab.
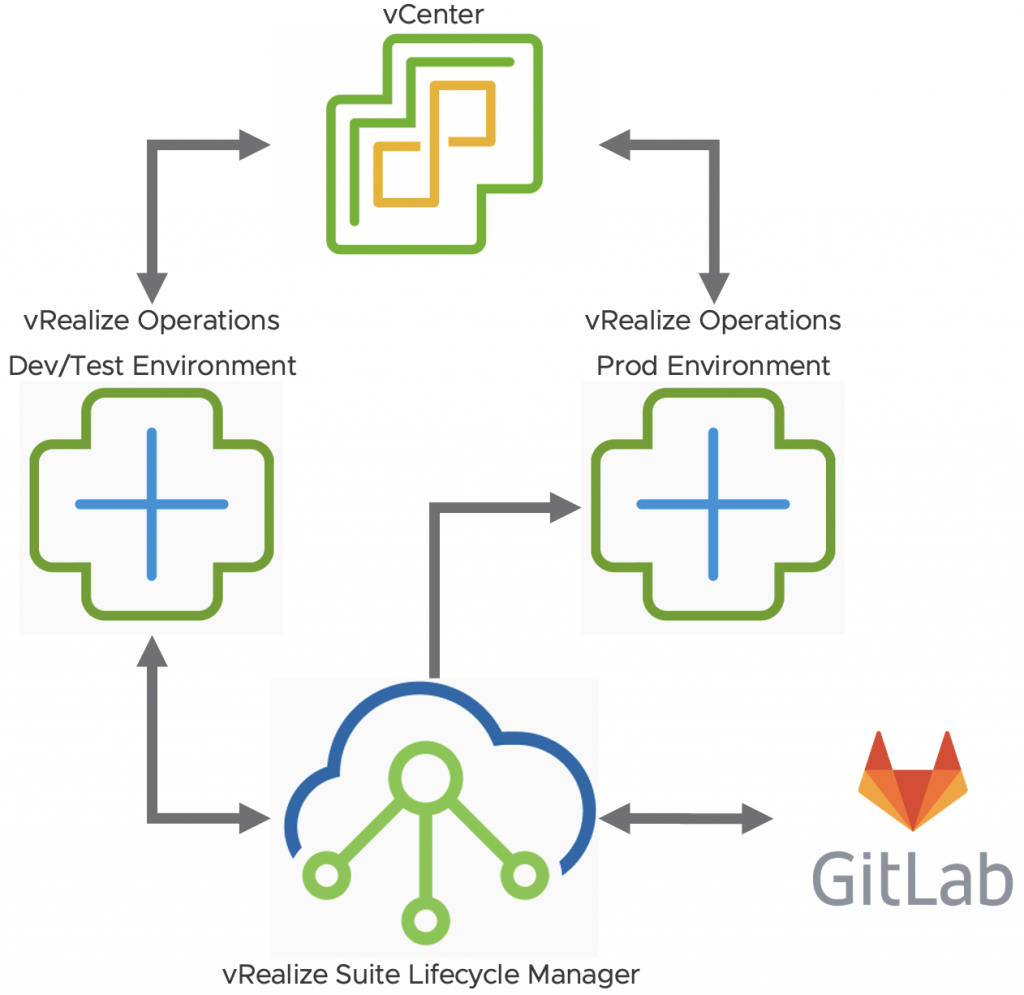
vRSLCM Configuration Overview
In this post I am not going to describe how to configure vRealize Suite Lifecycle Manager, how to add content endpoints is described in detail here:
For the walkthrough presented in this post I have configured following content endpoints in my vRSLCM.
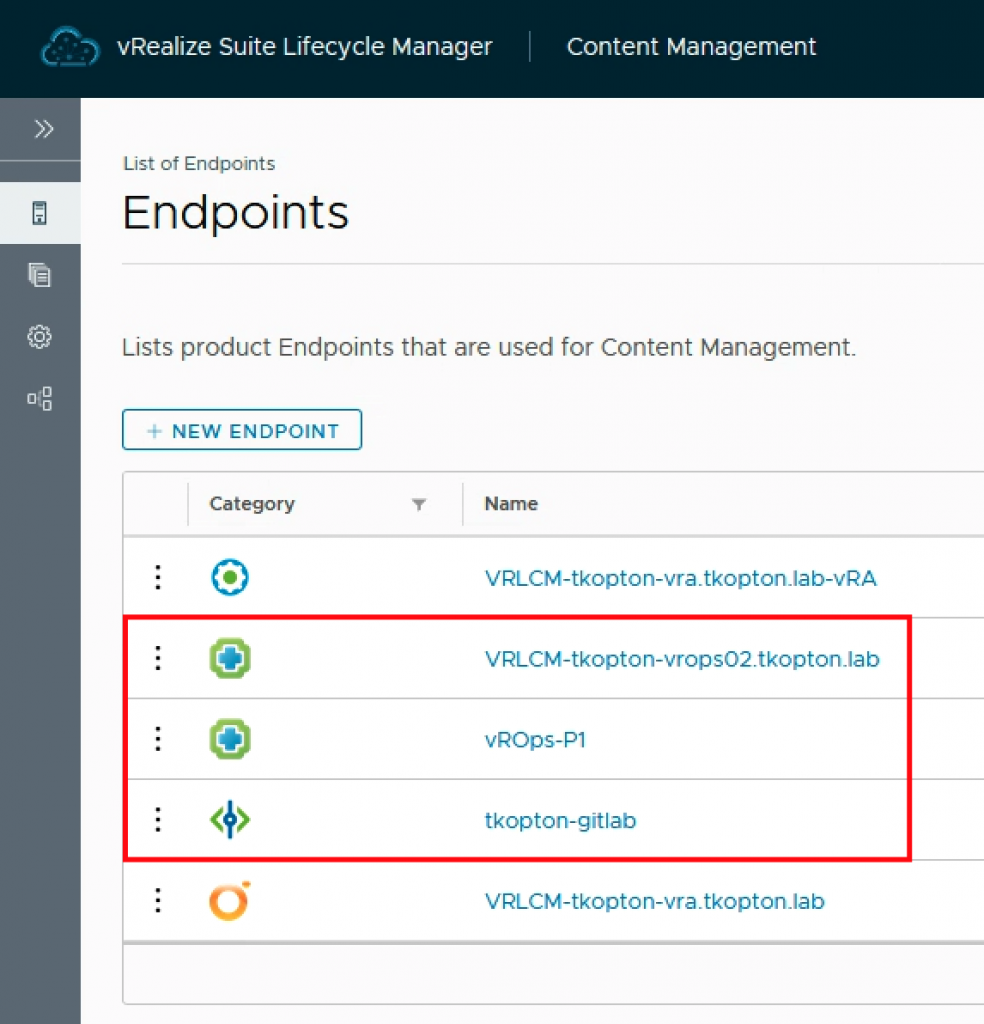
I have a vRSLCM-deployed vROps instance, serving as my Dev/Test and a vROps-P1 which is the production instance.
Important configuration detail here is, that the production vROps, vROps-P1, is set to accept source controlled content only. If you have only one vROps checking in content into vRSLCM repository you probably won’t set that option. If you do, you will need a source control endpoint, like GitLab. I have set that option to showcase the usage of GitLab and how changes to the content source in GitLab itself can be handled.
Walkthrough – Overview
The steps in my walkthrough are:
- Have a content in Dev/Test vROps you would like to deploy to Prod vROps.
- Capture content from Dev/Test into vRSLCM repo and GitLab (including Git merge).
- Try to deploy content to Prod vROps from vRSLCM repo directly.
- Capture and deploy content from GitLab to Prod vROps.
- Modify content in GitLab.
- Re-capture from GitLab and deploy to all vROps endpoints.
Step 1 – vROps Content
For the demo I am using a simple dashboard as shown in the following picture.

The goal is to deploy this dashboard into the production vROps environment.
Step 2 – Capture Content
We start the capture process using the “Add Content” feature.
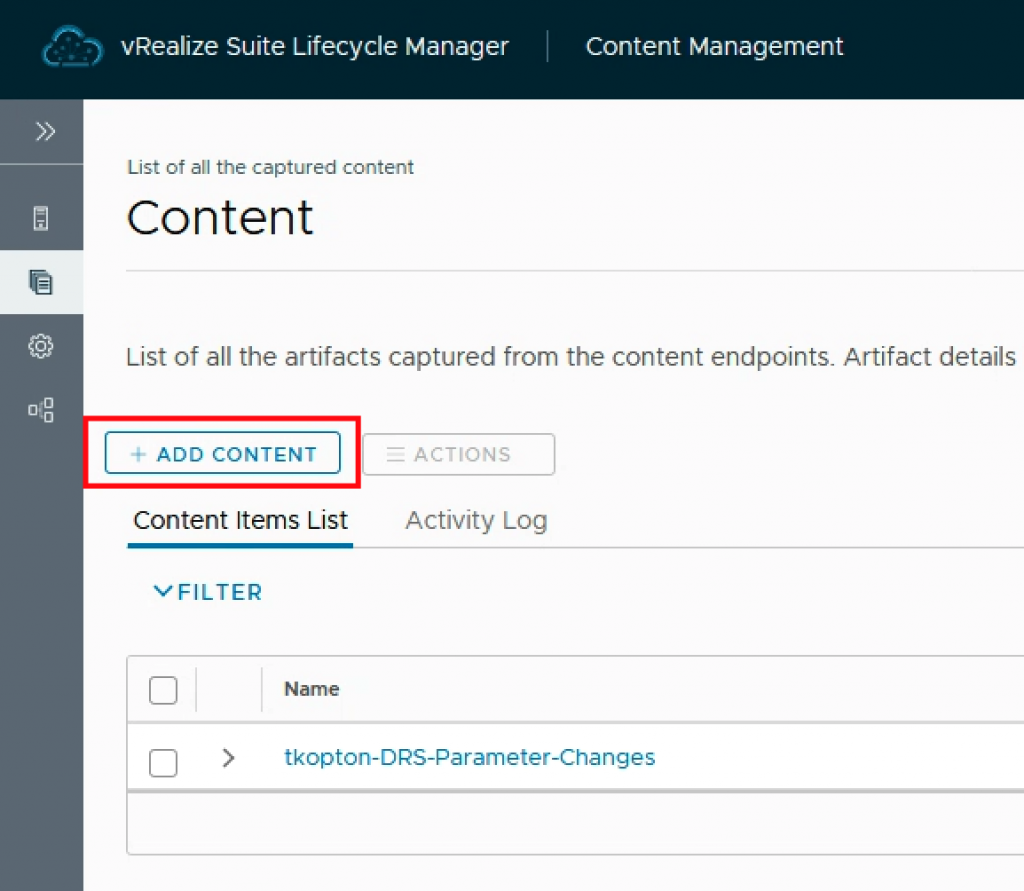
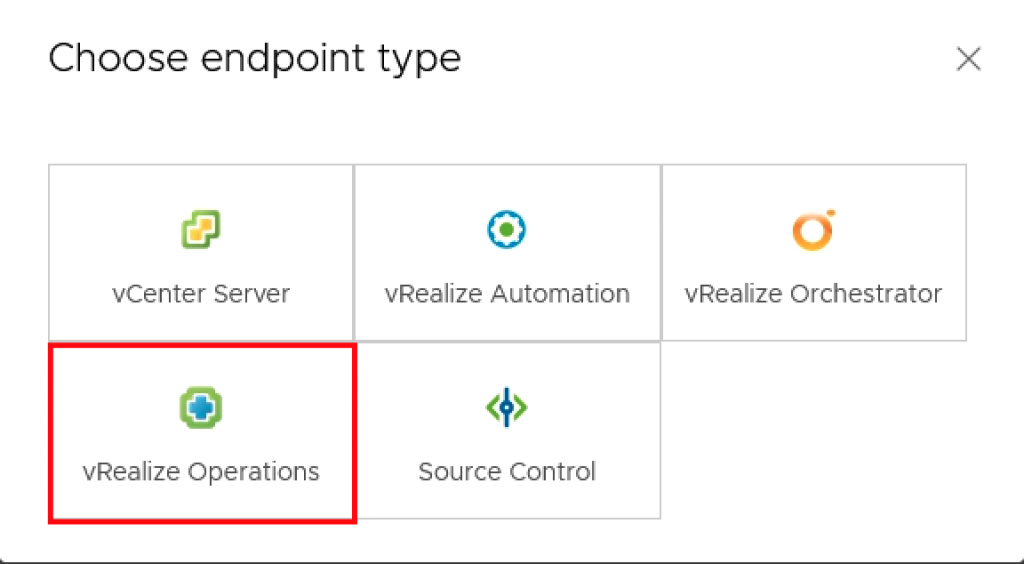
Obviously we select vRealize Operations as the content endpoint type.
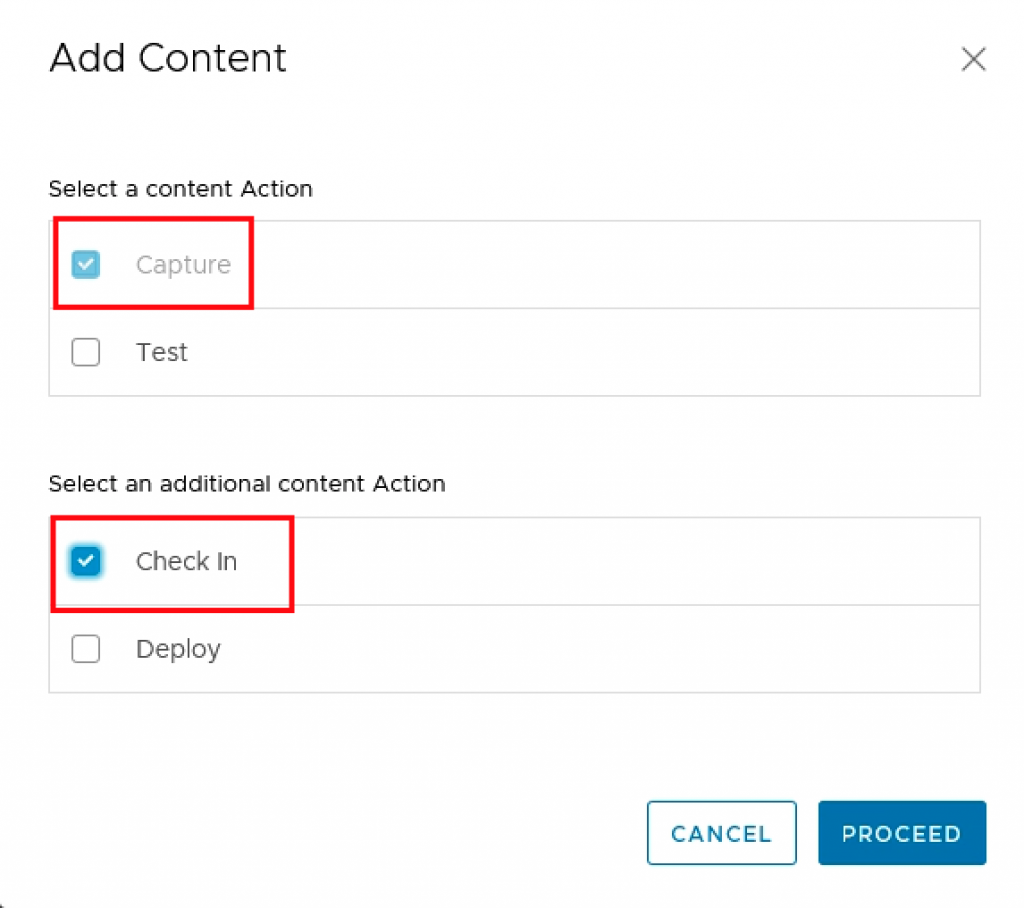
As we want to capture the content into the internal vRSLCM repository and into the source controlled repo – GitLab in one step, we are selecting both respective options.
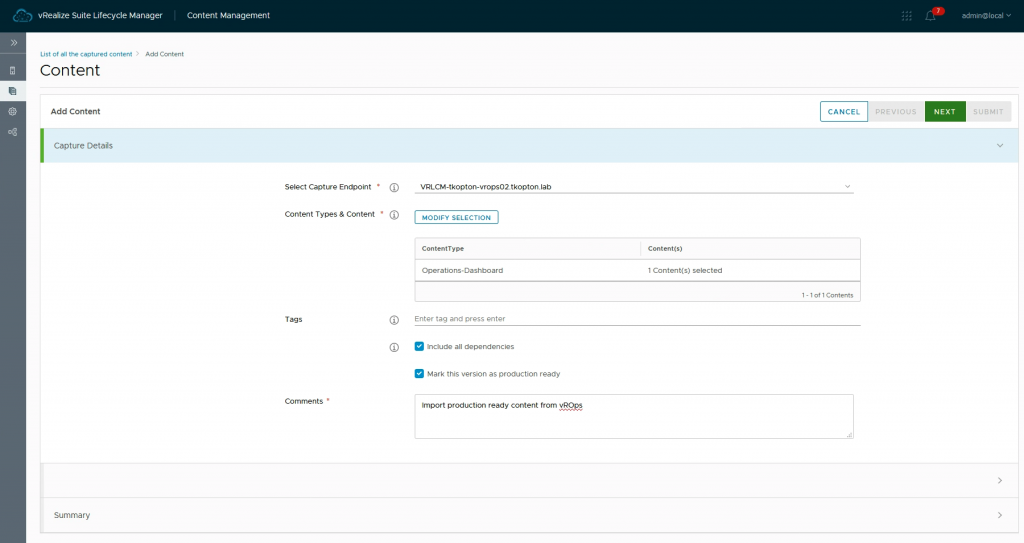
We select the source endpoint and the dashboard itself. I have also set the option to import all dependencies. In this case there are no dependencies like for e.g. views used as widgets, in other scenarios, vRSLCM will resolve the dependencies and import all needed content parts. I have also selected the “mark content as production ready” option to allow that content to be deployed to my production vROps.
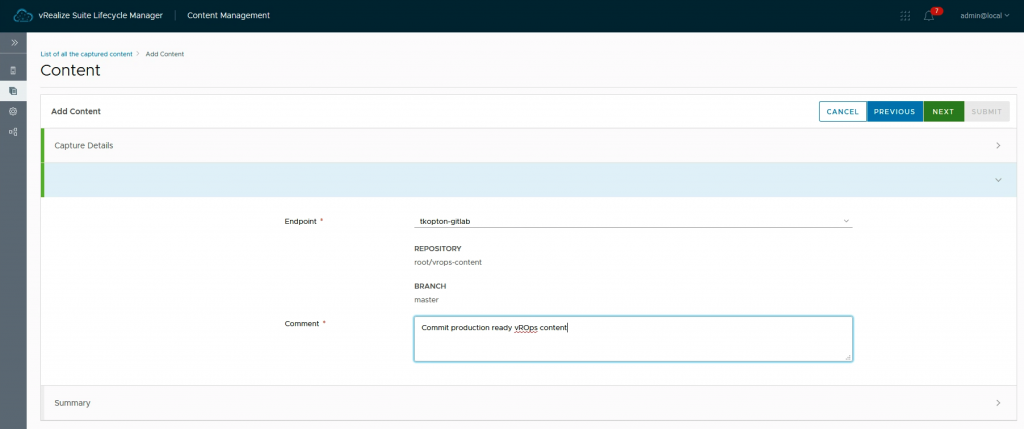
As we are checking in the content into GitLab, we need to specify the endpoint, repo and branch.
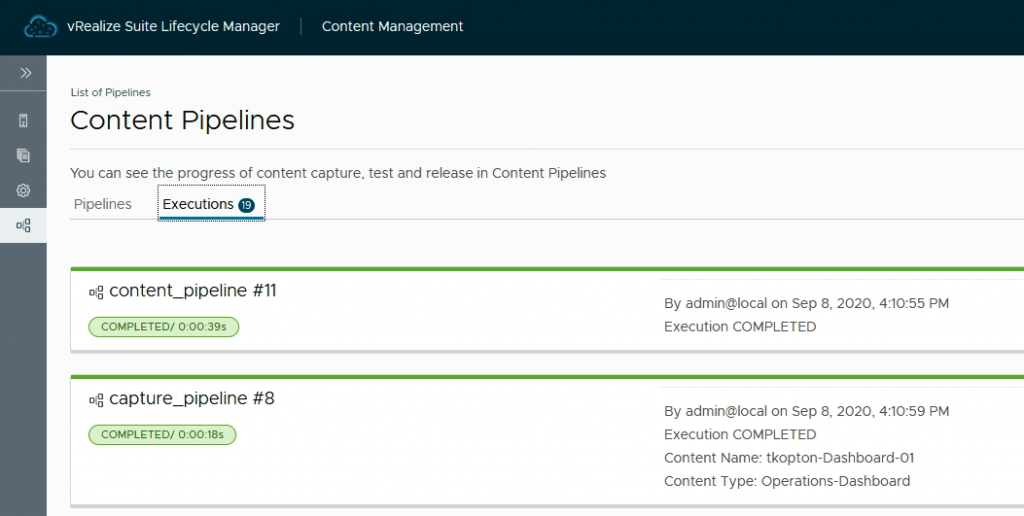
After few seconds the content pipelines complete.
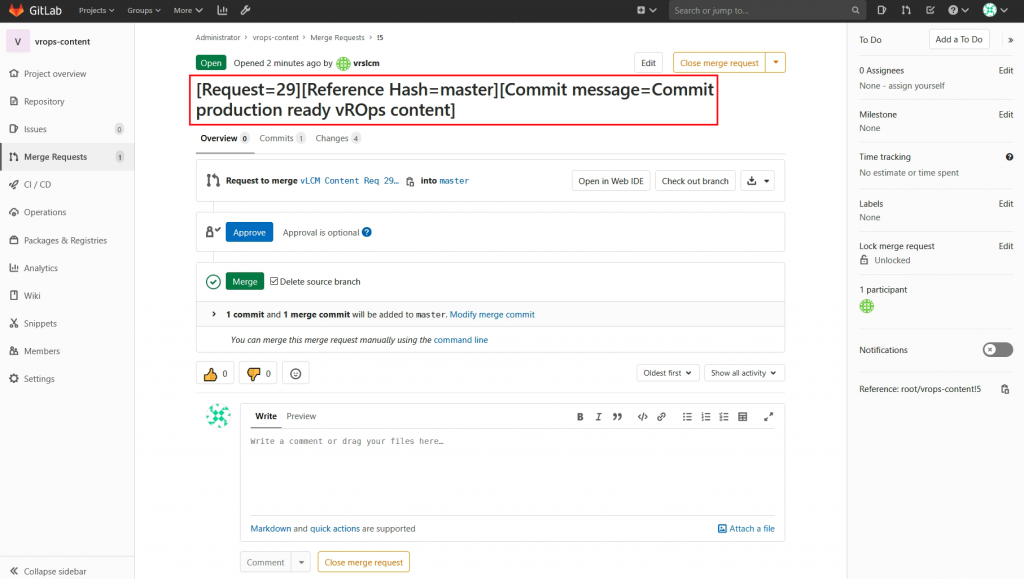
Now we see the merge request in GitLab and after merging the request, the dashboard is available in GitLab repo and treated as any other code.

Step 3 – Deploy Content – First Attempt
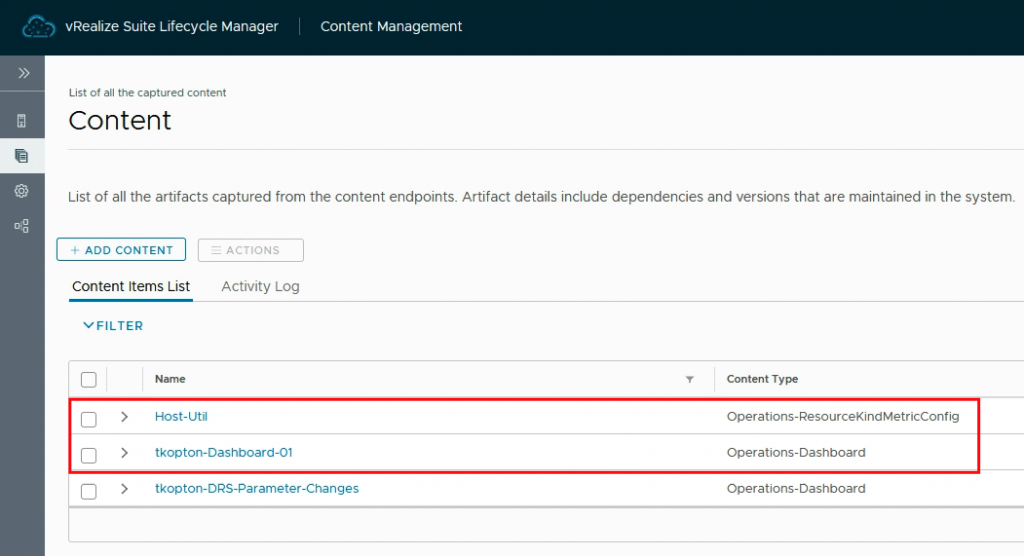
At this point we have our dashboard as content in vRSLCM repo and in GitLab.
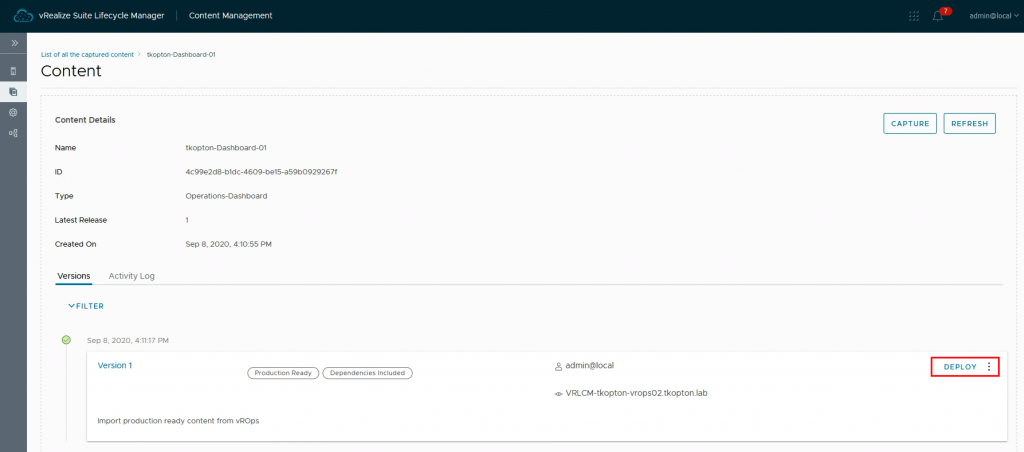
If we now open the tkopton-Dashjboard-01 we will see the details of the first version and the option to deploy the content to another vROps endpoints.
In the next picture we can see that our vROps-P1 is not listed as an available endpoint. This is because I have configured that endpoint to accept source controlled content only. This version is not source controlled, it has been captured from Dev/Test vROps into vRSLCM repo, not from the GitLab.
That means, we need to capture the content from GitLab first to be able to deploy it into the production vROps.
Step 4 – Capture from GitLab and Deploy Content – Second Attempt
We start another capture and deploy (in one step) process and this time we select our GitLab as the source.
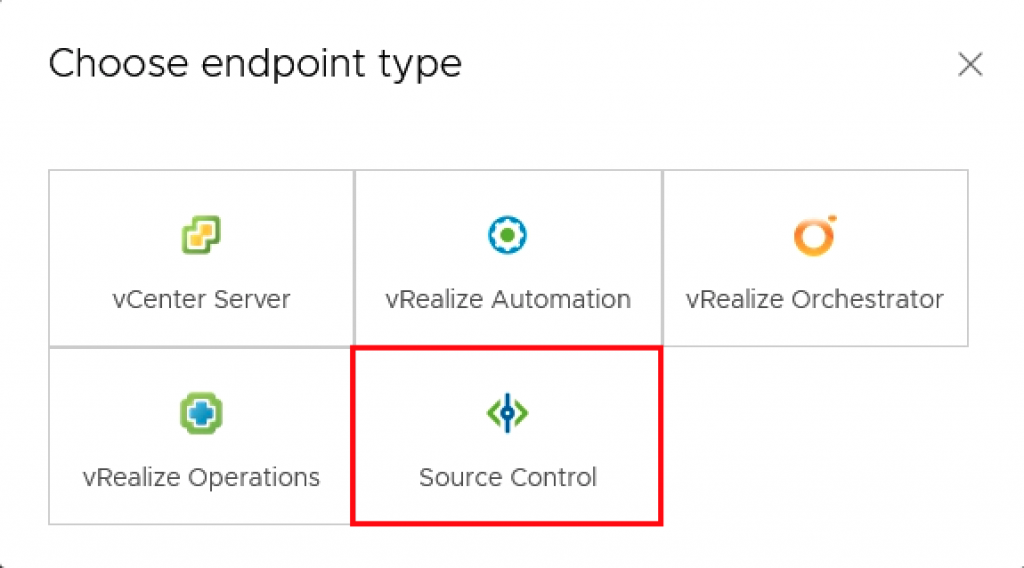
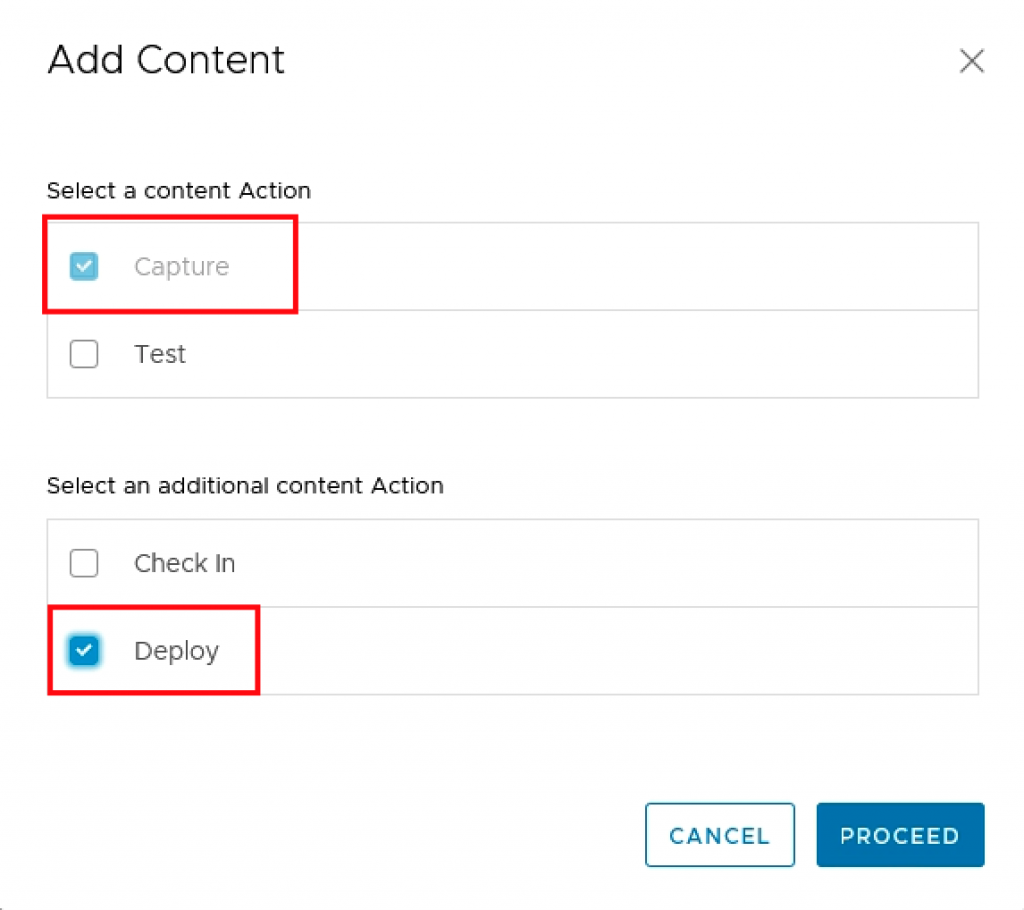
We use the same settings as during the first attempt, the capture endpoint is different.
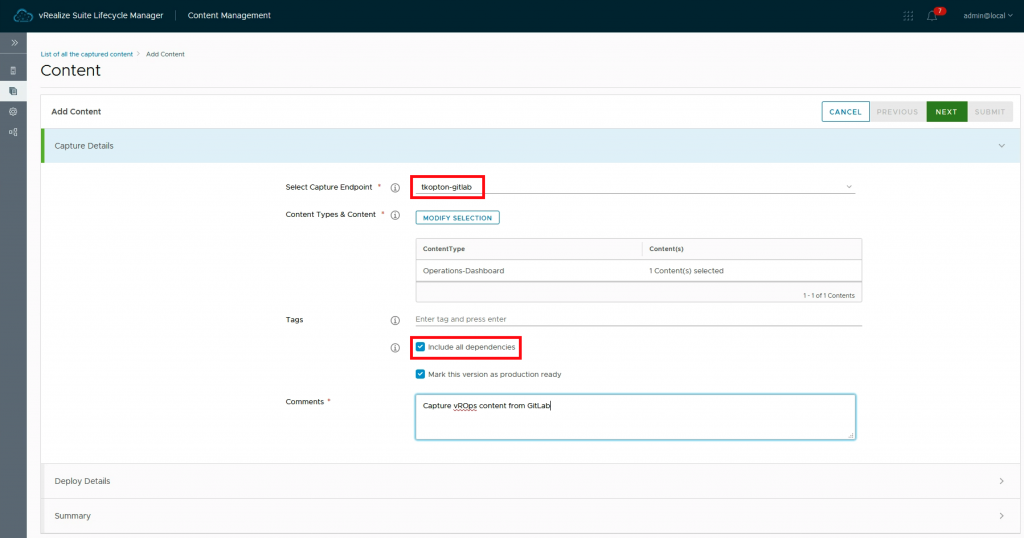
As we are doing capture and deploy in one step, we need to specify the deployment target and options.
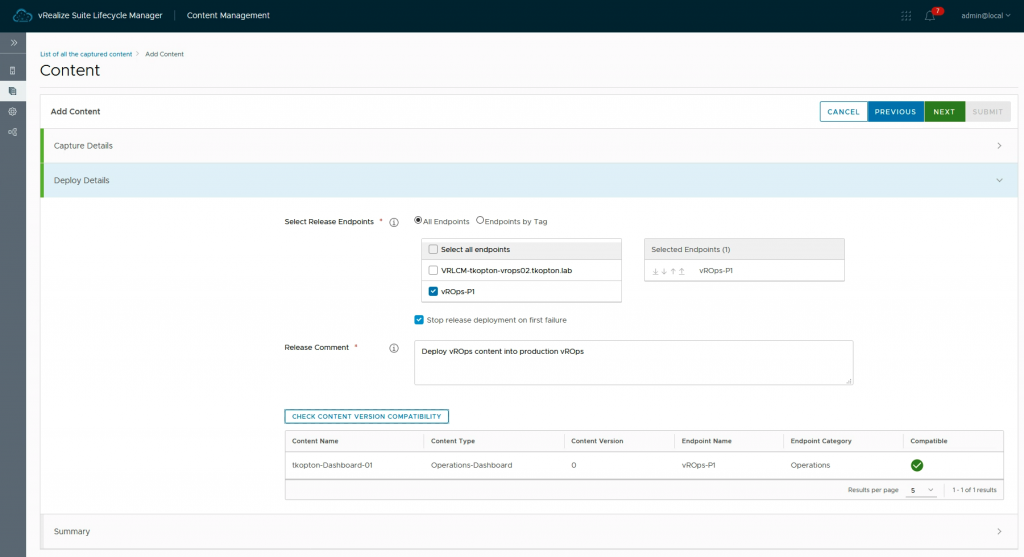
And now we can see in the Figure 17 that our production vROps-P1 is available in the list of destination endpoints.
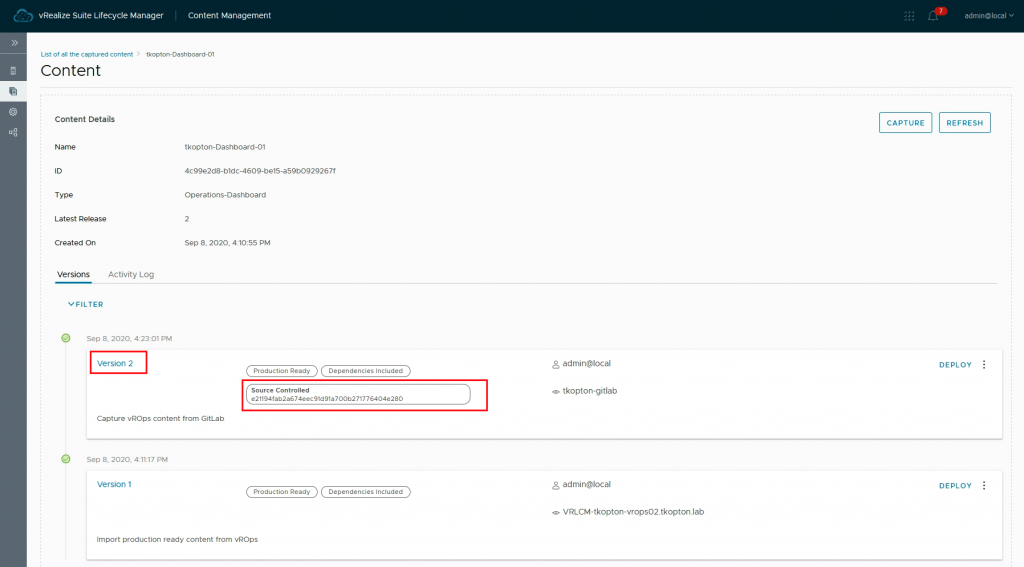
Now the same dashboard is available in the production vROps and in vRSLCM repo we see the second version of the dashboard wich is source controlled.
Step 5 – Edit Content in GitLab
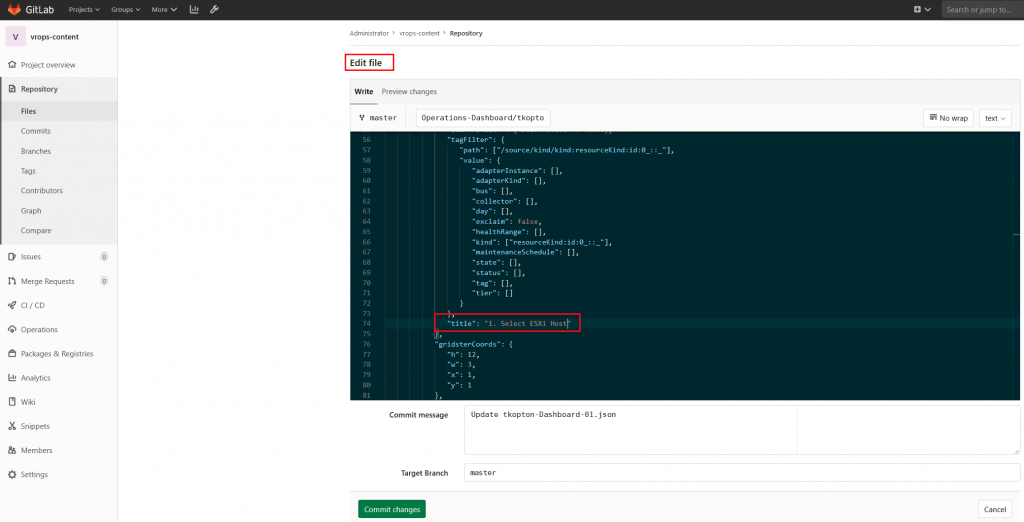
Let us change the name of one of our widgets. And let us do it in GitLab instead of editing the dashboard in vROps. The dashboard is just another source code from the content repository perspective.
Step 6 – Re-Capture and Re-Deploy Content
After re-capturing the content from GitLab following the same procedure as in step 4 but this time without deploying the content, we see another version in the vRSLCM repo.

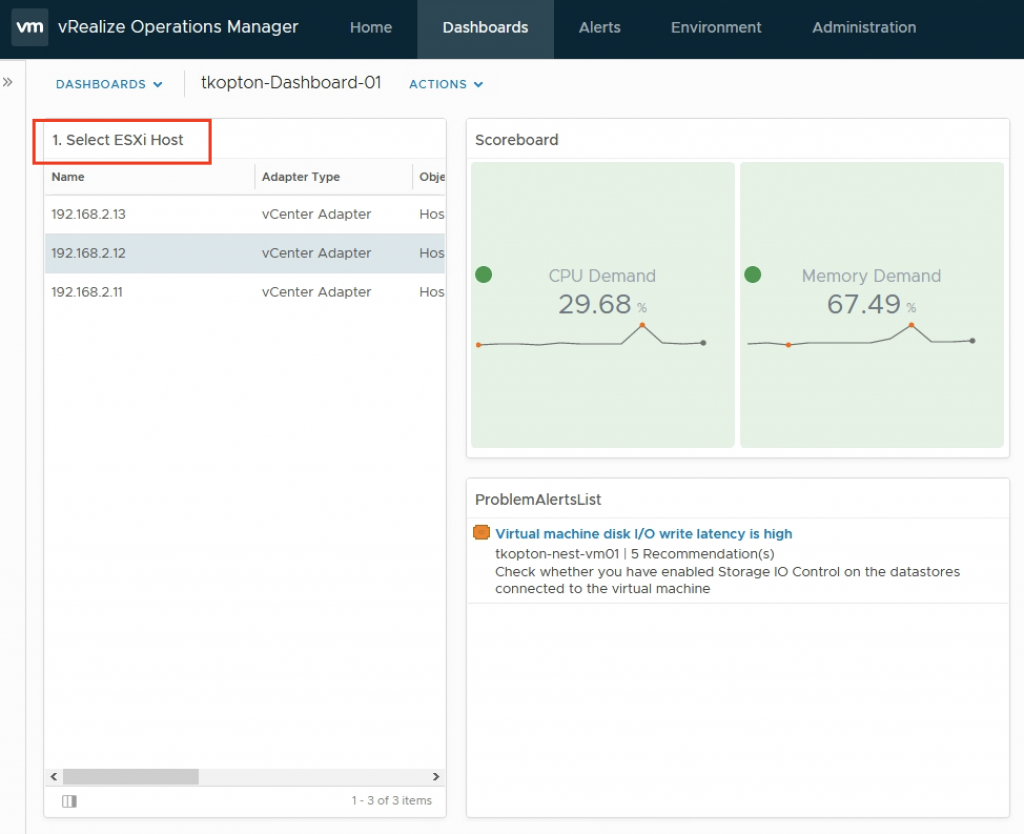
After deploying the updated content to our vROps endpoints, we see the dashboard having a new caption for the first widget.
Conclusion
With vRealize Suite Lifecycle Manager and GitLab you have a perfect foundation to create your own CD pipeline for vRealize Operations content.
In the next part I will describe how to extend the pipelines with custom workflows provided by e.g. vRealize Orchestrator.
Stay safe.
Thomas – https://twitter.com/ThomasKopton
