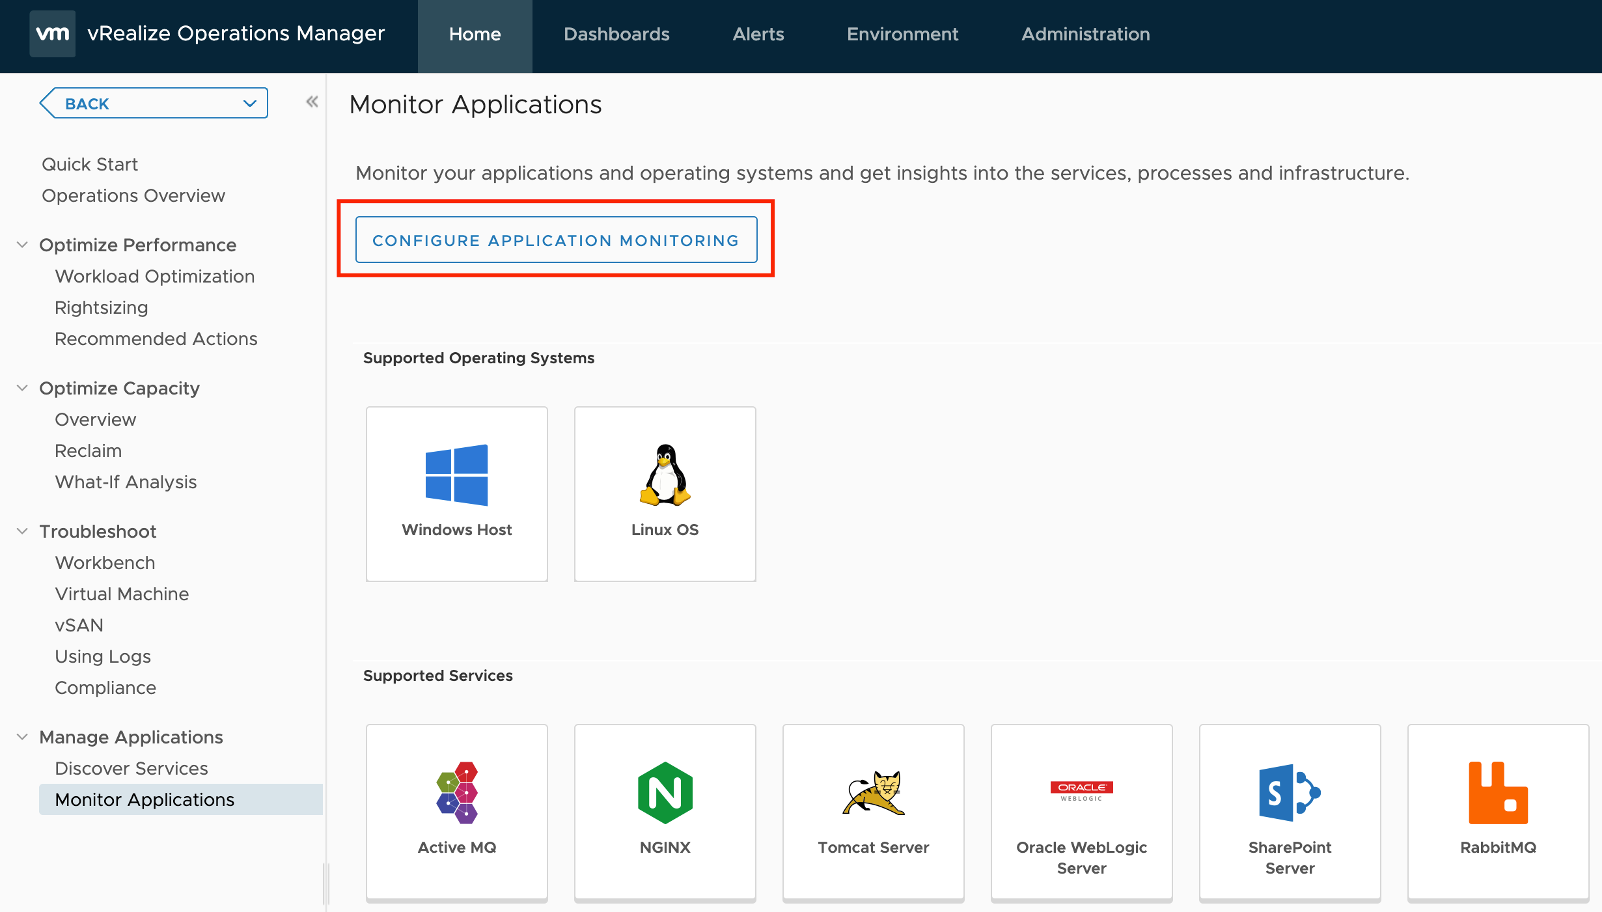
vRealize Operations with its four main pillars: Optimize Performance Optimize Capacity Troubleshoot Manage Configuration provides a perfect solution to manage complex SDDC environments. The “Optimize Performance” part of vRealize Operations provides a wide range of features like workload optimization to ensure consistent performance in your datacenters or VM rightsizing to reduce bottlenecks and ensure best …
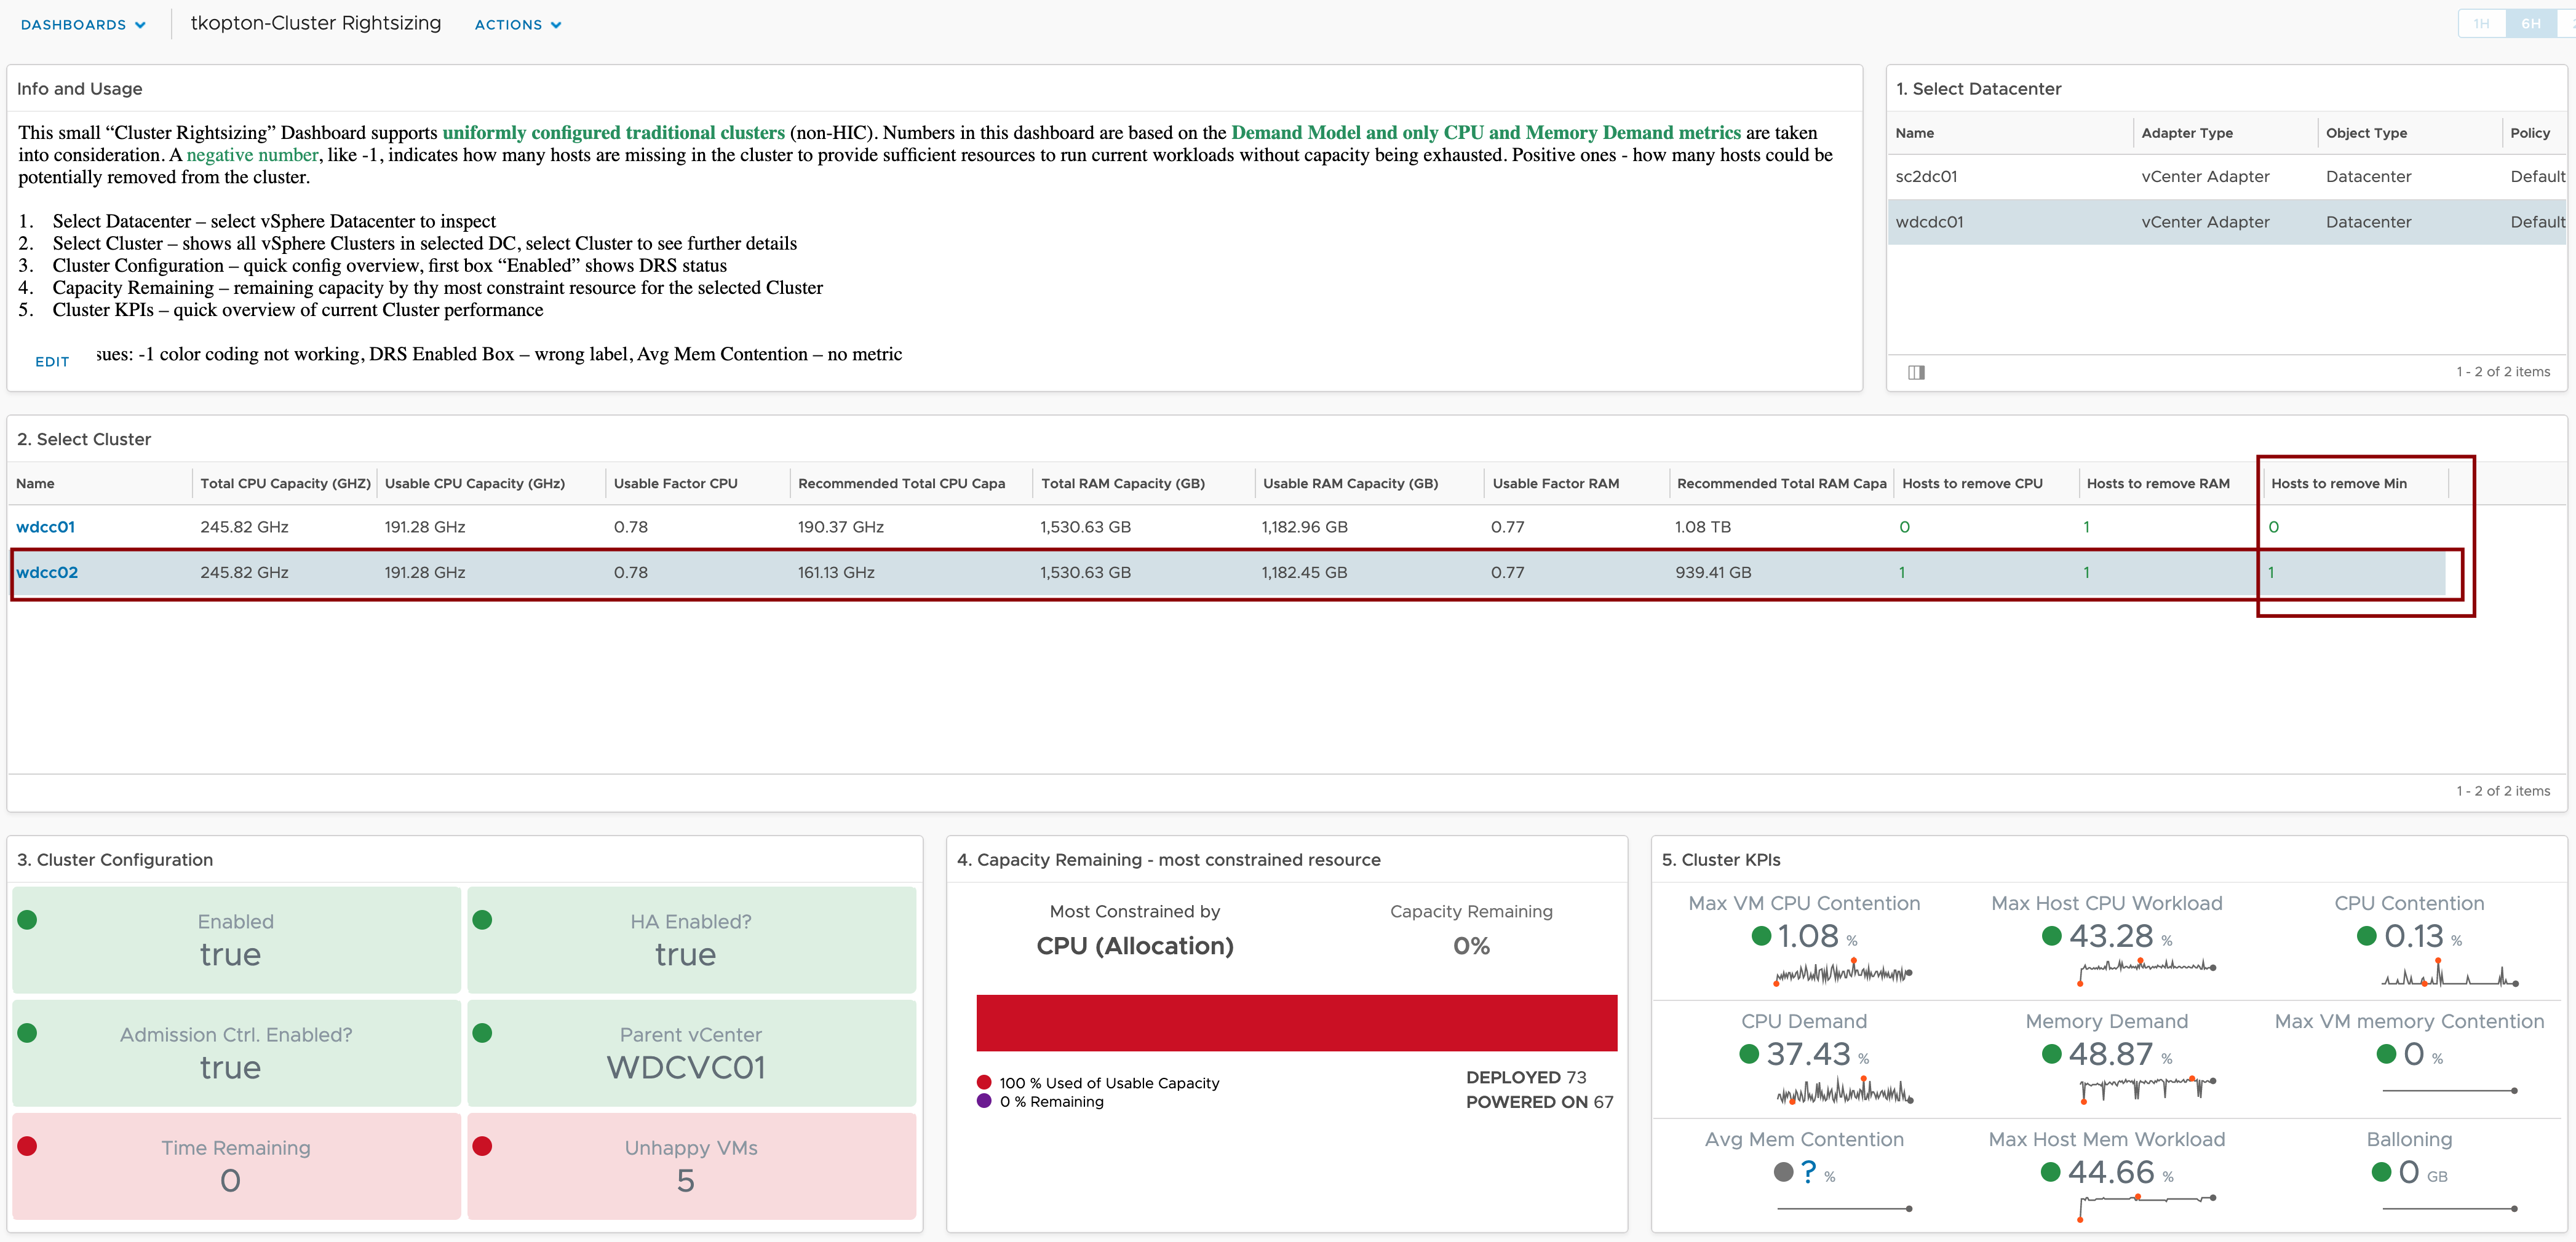
ESXi Cluster (non-HCI) Rightsizing using vRealize Operations